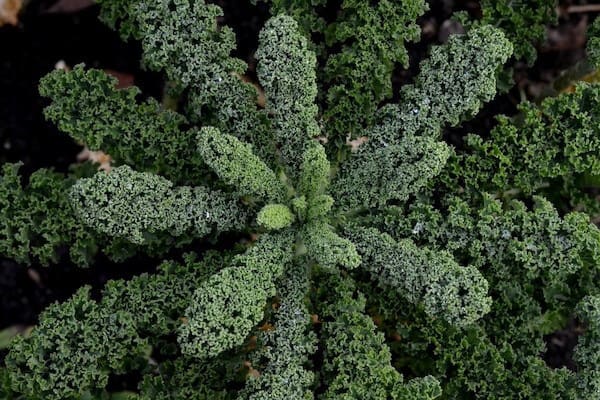
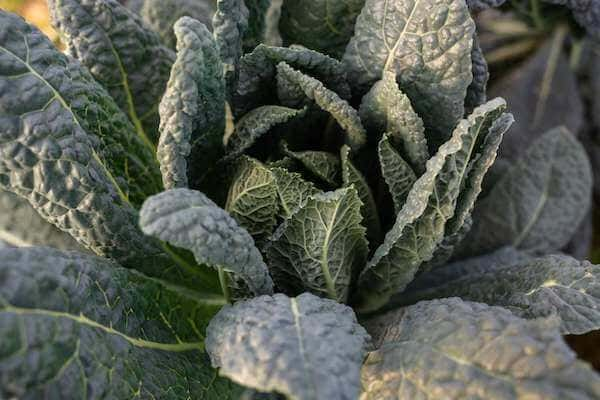
Choosing the Perfect Green for your Container or Backyard Garden

No matter your level of experience in gardening - whether you're a veteran or a beginner - you've probably come across a wide range of verdant plants that can flourish in your garden. These leafy greens are not only a healthy and tasty choice, but they also add a beautiful touch of greenery to any garden setting. Given the multitude of choices, picking out the ideal leafy green for your garden might seem intimidating. Here is detailed information about various types of greens, including lettuce, spinach, beet tops, chard, and kale, that will help you to make a knowledgeable decision about what to plant in your garden.

Growing Lettuce: A Closer Look at Its Diversity in Form, Size, and Color

Lettuce is a flexible and low-maintenance green vegetable that is available in a diverse array of forms, dimensions, and hues. It primarily comes in four different types, each boasting its own unique features:

Romaine Lettuce, Paris Cos and Little Gem: Lettuce Varieties You Should Grow

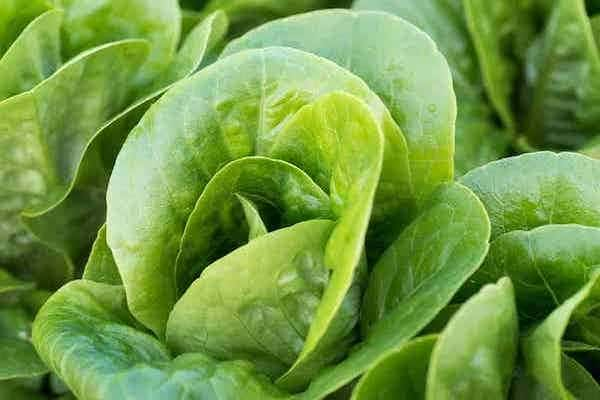
This variety has long, sturdy leaves that are slightly bitter and crunchy. Romaine lettuce is excellent for salads and can be used as a wrap for sandwiches. Numerous types of romaine lettuce are accessible to garden enthusiasts, each distinguished by its own specific traits. Here are some popular romaine lettuce varieties:

  • Parris Island Cos
  • Little Gem
  • Rouge d'Hiver
  • Cimmaron
  • Winter Density
romaine lettuce

Time of year to plant: Romaine lettuce is a cool season crop that grows best in temperate climates with mild temperatures. Planting romaine lettuce is best during the spring and fall periods when conditions are most favorable for its growth. For those residing in temperate zones, it's advised to plant the lettuce seeds 4-6 weeks ahead of the last anticipated frost in the spring. This timing allows the seeds sufficient time to sprout and stabilize before the onset of higher temperatures. For fall planting, sow seeds 6-8 weeks before the first expected frost to ensure that the lettuce has enough time to mature before the weather becomes too cold. Romaine lettuce prefers full sun to partial shade and grows best in well-draining soil with a pH level between 6.0 and 7.0. Maintaining a steady level of soil moisture throughout the growing period is crucial for encouraging the optimal growth and maturation of the plant. By sowing your romaine lettuce at the right time and ensuring suitable growing conditions, you can look forward to a rich yield of fresh, crunchy lettuce leaves to enhance your salads and various other recipes.

Suggested fertilizers: When growing romaine lettuce, it's important to provide proper fertilization to promote healthy growth and development. For chemical fertilizers, a balanced fertilizer with an N-P-K ratio of 10-10-10 is recommended, and it can be applied according to package instructions at the time of planting and mid-season. On the other hand, organic fertilizers like compost, matured manure, or fish emulsion can be employed to enrich the soil with the vital nutrients it requires. These organic options can also help improve soil fertility and drainage, ultimately leading to healthier plants. It's crucial to steer clear of over-fertilizing, as it can trigger overgrowth and compromise the quality of the lettuce leaves. Applying fertilizers in moderation and following package instructions carefully can help prevent these issues. Additionally, it's important to conduct soil tests periodically to determine any nutrient deficiencies and adjust the fertilization program accordingly. By using the right fertilizers and application techniques, you can ensure that your romaine lettuce grows strong and healthy, producing abundant and nutritious leaves for your consumption.

Days to maturity: It is important to consider the number of sun days and sun hours, as this can affect the time it takes for romaine lettuce to mature. Growing romaine lettuce effectively usually requires daily exposure to sunlight for 6-8 hours, so selecting a location with sufficient sunlight is crucial. Moreover, the maturation period can differ based on the exact type of romaine lettuce cultivated, as certain varieties might mature in as few as 45 days, while others could require up to 85 days. It's important to check the seed packet or plant label for specific information about the variety you are growing, to ensure that you provide the right growing conditions and harvest the lettuce at the appropriate time. By providing the right amount of sunlight and paying attention to the specific variety being grown, like Parris Island Cos, Little Gem, Rouge d'Hiver, Cimmaron and Winter Density, you can help ensure that your romaine lettuce grows strong and healthy, producing crisp and delicious leaves for your enjoyment.

Regrow capability: Romaine lettuce has the impressive ability to regrow from its base after harvesting, making it an excellent choice for gardeners who want to enjoy multiple harvests from a single plant. To encourage regrowth, it's recommended to leave at least 1-2 inches of the stem and a few leaves intact when harvesting the lettuce. Employing sharp cutting instruments, like garden shears or a keen knife, aids in making precise cuts and lessening harm to the plant. Post-harvest, it's crucial to ensure the plant is adequately hydrated to stimulate new growth, and you should notice new leaves emerging within a couple of weeks. By using the right cutting tools and following these simple tips, you can enjoy multiple harvests of delicious and fresh romaine lettuce throughout the growing season.

Sweet to bitterness scale: Romaine lettuce is known for its mild and slightly bitter taste, but the bitterness level can be influenced by several factors. The variety of romaine lettuce being grown can play a role in the level of bitterness, as some varieties are naturally sweeter or more bitter than others. In addition, the growing conditions can also impact the taste of the lettuce. Cooler temperatures and consistent moisture can promote a sweeter taste, while exposure to high temperatures or uneven watering can result in a more bitter taste. It's also worth noting that as romaine lettuce ages, it can become more bitter in taste. To minimize bitterness in your romaine lettuce, it's recommended to choose a sweet variety and provide consistent watering and moderate temperatures. By adhering to these guidelines, you can relish the delectable and invigorating flavor of fresh romaine lettuce leaves in your salads and a variety of meals.

Preferred soil: Romaine lettuce thrives in a well-draining soil, rich in organic substances, with a pH level ranging from 6.0 to 7.0. Sandy loam soils are ideal for growing romaine lettuce as they allow for good drainage and aeration. Heavy clay soils can be problematic as they tend to retain water and can lead to root rot. Additionally, the soil should be able to hold moisture to ensure consistent growth and development of the lettuce.

To improve the soil, for romaine lettuce growth, amendments such as compost, well-rotted manure, or peat moss can be added. Compost and well-rotted manure are excellent sources of organic matter, which improves soil structure and fertility. Peat moss is also a good amendment for improving soil structure, as it increases water retention in sandy soils and improves drainage in heavy clay soils. Furthermore, incorporating perlite or vermiculite into the soil can enhance its aeration and drainage capacity. If the pH level is below the desired range, lime can be added to increase it. Yet, one should be careful not to over-fertilize as it may lead to rampant growth and inferior lettuce quality.

A typical romaine lettuce plant measures about 10-12 inches in height and 6-8 inches in width, although some types can grow considerably larger. For example, the Parris Island romaine lettuce variety is known for its large size, with mature plants reaching up to 18 inches in height and 10-12 inches in width. Likewise, the variety of Red Romaine lettuce can reach up to 16 inches tall and 10 inches wide, positioning it as an excellent option for gardening enthusiasts who aspire to cultivate large and attractive lettuce plants. On the other hand, the Little Gem romaine lettuce variety is one of the smallest, with mature plants typically reaching only 6-8 inches in height and width. This variety is ideal for gardeners with limited space or who want to grow lettuce in containers. By choosing the right variety of romaine lettuce and providing optimal growing conditions, you can grow plants of various sizes and enjoy fresh, delicious lettuce leaves throughout the growing season.

Average number of leaves per plant: Average leaf count per plant: Romaine lettuce leaves are characteristically long, boasting a firm and crunchy texture, and they usually measure from 7-9 inches in length and 3-4 inches in width. The leaves are a vibrant green color and are arranged in a tight, upright head, with 12-16 leaves per plant. Leaves of romaine lettuce are a powerhouse of vital vitamins and minerals like vitamins A, C, and K, folate, and potassium. These nutrients are key to sustaining bone health, eye health, and immune functionality, making romaine lettuce a wholesome supplement to any eating regimen. Plus, being low in calories and high in fiber, romaine lettuce leaves are an excellent option for those managing their weight and fostering healthy digestion. By including romaine lettuce in your meals, you can enjoy the delicious taste and numerous health benefits of this versatile and nutritious leafy green.

Potential seed production per plant: When it comes to seed production, a single romaine lettuce plant can produce hundreds of seeds once it bolts and flowers. The seeds themselves are small and can range in color from light beige to brown. Romaine lettuce plants produce small seed pods, which contain the seeds and are attached to the plant via a stem. The flowers of the romaine lettuce plant are small and typically yellow or green in color. It's important to note that lettuce grown for seed production should be grown separately from lettuce grown for consumption, as the plant's focus on seed production can cause the leaves to become bitter or tough. Nonetheless, one romaine lettuce plant can generate an impressive quantity of seeds. This makes it an ideal choice for gardeners interested in preserving their own lettuce seeds for subsequent plantings.

Exploring Soft Lettuce Varieties: Butterhead, Boston, Bibb, and Buttercrunch

Soft, tender leaves with a mild flavor characterize this type of lettuce. Boston and Bibb are popular varieties of butterhead lettuce. There are about 30 varieties of butterhead lettuce available for gardens: Here are some popular butterhead lettuce varieties:

  • Boston
  • Bibb
  • Buttercrunch
  • Tom Thumb
  • Nancy
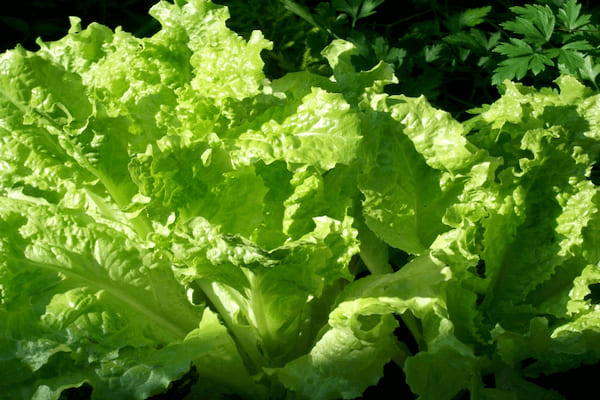
butterhead lettuce

Best time of the year to plant: Butterhead lettuce, a cool-season crop, thrives in mild temperatures, making the ideal time to plant it during spring and fall. When planting from seed, sow them directly into the garden or start them indoors, depending on the gardener's preference and local climate conditions.

In spring, sow butterhead lettuce seeds 4-6 weeks before the last expected frost date. Starting seeds indoors can provide an earlier harvest and protect young seedlings from unexpected late frosts. When starting indoors, transplant the seedlings into the garden after they have developed at least two true leaves and the danger of frost has passed. For a continuous harvest, sow seeds every 2-3 weeks during the spring season.

For fall planting, sow seeds 6-8 weeks before the first expected frost date. Fall-planted butterhead lettuce often has a sweeter flavor due to the cooler temperatures and shorter daylight hours. In regions with mild winters, gardeners can continue planting butterhead lettuce seeds throughout the fall and winter months for a continuous harvest.

Nursery transplants are another option for planting butterhead lettuce. These can be planted in the garden once the danger of frost has passed in spring or during the recommended fall planting window. When transplanting, space them 8-12 inches apart to allow for optimal growth and air circulation.

Regardless of the planting method, ensure that butterhead lettuce receives adequate water, sunlight, and nutrients for the best growth and a bountiful harvest.

Fertilizers: Fertilizing butterhead lettuce plants plays an essential role in ensuring healthy growth and a bountiful harvest. Providing the right nutrients allows the plants to develop robust root systems, vibrant green leaves, and resistance to pests and diseases. There's a range of fertilizer choices at your disposal, encompassing both organic and synthetic options, all designed to meet the unique requirements of the plant. Nitrogen is particularly crucial for leafy greens like butterhead lettuce, as it promotes vigorous leaf growth and the production of chlorophyll. Phosphorus and potassium are also vital for root development and overall plant health.

Applying a balanced, slow-release granular fertilizer or a liquid fertilizer with a high nitrogen content at planting time can help supply the necessary nutrients throughout the growing season. Follow the manufacturer's recommendations for application rates and frequency. Additionally, side-dressing the plants with compost or well-rotted manure can provide a natural source of nutrients and improve soil structure. When growing butterhead lettuce hydroponically, the fertilizing process differs from traditional soil-based cultivation. In hydroponic setups, plants absorb their nutrients straight from a water solution loaded with nutrients. This solution must be meticulously prepared to ensure an ideal blend of macro and micronutrients. Regularly monitor and adjust the nutrient solution's pH, electrical conductivity (EC), and nutrient levels to maintain optimal growing conditions for hydroponic butterhead lettuce. By understanding the specific fertilizing requirements of butterhead lettuce and selecting the appropriate fertilization method, gardeners can cultivate a thriving, productive crop in both soil-based and hydroponic systems.

Number of days to maturity: Achieving full maturity for butterhead lettuce depends on several factors, including the number of sun and rain days it receives during its growth. On average, butterhead lettuce takes 60-75 days to reach maturity from seed or 50-60 days from transplanting, depending on the variety and growing conditions.

Sunlight plays a crucial role in the growth and development of butterhead lettuce. These plants favor a location that provides full sun to partial shade, needing a minimum of 6 hours of daily sunlight for the best possible growth. In areas with intense sun and high temperatures, providing some afternoon shade can help prevent bolting and maintain the tender, mild flavor of the lettuce leaves. Consistent sunlight exposure promotes photosynthesis, which in turn supports the development of healthy, lush leaves.

Rain and water availability are equally important for the successful cultivation of butterhead lettuce. These plants have a relatively shallow root system and require consistent moisture to grow well. The ideal amount of rainfall for butterhead lettuce is approximately 1-1.5 inches per week. In the absence of sufficient rain, supplemental watering is necessary to maintain consistent soil moisture. Overwatering or inconsistent watering can lead to issues such as root rot, fungal diseases, or cracked heads. It is essential to strike a balance between providing adequate moisture and preventing waterlogged conditions. By ensuring that butterhead lettuce receives the appropriate amount of sun and rain days, or supplemental water when needed, gardeners can successfully grow these plants to full maturity, resulting in a healthy and flavorful harvest.

Cut and regrow capability: Butterhead lettuce, similar to other leafy green vegetables, possesses the capacity to regrow following its harvest. However, this secondary growth may not be as robust as the initial growth phase. This cut-and-come-again method allows gardeners to harvest fresh leaves multiple times from the same plant throughout the growing season, prolonging the harvest period and reducing the need for continuous planting.

To encourage regrowth, proper harvesting techniques are crucial. When harvesting butterhead lettuce, start by selecting the outer leaves, which are the most mature and ready for harvest. Carefully cut the leaves about an inch above the base of the plant, leaving the central growing point and some smaller inner leaves intact. This will allow the plant to continue growing and producing new leaves. It is important not to damage the central growing point, as this could hinder regrowth and negatively affect the overall health of the plant.

After the initial harvest, continue to provide the butterhead lettuce plants with the necessary care, including adequate water, fertilization, and sunlight, to ensure optimal regrowth. New leaves will begin to emerge from the central growing point within a week or two, depending on the growing conditions and variety. Bear in mind that the regrowth might not be as swift as the original development, and the plants may not yield as abundant a leaf production as they did at first. By employing proper harvesting techniques and maintaining a favorable growing environment, gardeners can take advantage of the cut-and-regrow capability of butterhead lettuce and enjoy a prolonged harvest of fresh, homegrown greens.

Soil: Improving soil fertility is essential for growing big, beautiful, and great-tasting butterhead lettuce. Incorporating plant beneficial additives into the soil can significantly enhance the availability of essential nutrients and improve overall soil health, resulting in a thriving and productive crop. Here are some strategies to enhance soil fertility for butterhead lettuce:

  • Add organic matter: Incorporate compost, well-rotted manure, or other organic matter into the soil. Organic matter improves soil structure, increases water retention, and enhances nutrient availability. As organic substances decompose, they emit vital nutrients like nitrogen, phosphorus, and potassium, which are essential for the healthy growth of butterhead lettuce.
  • Use balanced fertilizers: Apply a balanced, slow-release granular fertilizer or a liquid fertilizer with a high nitrogen content at planting time, following the manufacturer's recommendations. Nitrogen is vital for promoting leaf growth, while phosphorus and potassium support root development and overall plant health.
  • Planting green manures or cover crops, such as legumes, can help improve soil fertility by fixing nitrogen from the atmosphere and adding organic matter to the soil. After the cover crop has grown for a few months, it can be tilled into the soil to release nutrients and improve soil structure.
  • Use bio-stimulants like seaweed extracts, humic acid, or mycorrhizal fungi to enhance nutrient uptake and root development. These additives can stimulate beneficial microorganisms in the soil, increase the availability of nutrients, and improve overall plant health and stress resistance.
  • Test the soil pH before planting and make any necessary amendments to achieve a pH range of 6.0 to 6.8, which is ideal for butterhead lettuce. Proper soil pH ensures optimal nutrient availability and uptake, as well as supports a thriving community of beneficial microorganisms.
  • Practice crop rotation: Rotate your butterhead lettuce crop with other plant families, such as legumes, brassicas, or root vegetables. Crop rotation helps prevent the build-up of soil-borne diseases, pests, and nutrient depletion.

Plant size: Plant dimensions: Butterhead lettuce typically attains a size of approximately 6 to 8 inches in diameter and 4 to 6 inches in height. Yet, the final size of the lettuce can fluctuate based on variables like the specific growing conditions, lettuce variety, and the duration allowed for maturation before harvest. It is important to harvest the lettuce before it becomes too large and begins to bolt, which can cause the leaves to become bitter and tough.

Leaves and seeds: Butterhead lettuce (Lactuca sativa) is a popular leafy green vegetable, known for its tender and mildly flavored leaves. The leaves of butterhead lettuce boast a unique, butter-like texture that distinctly differentiates them from other types of lettuce. They exhibit a light green color that gradually deepens toward the center, with some varieties displaying a faint reddish tint on the edges. Butterhead lettuce leaves can vary in size, with larger outer leaves encircling smaller, more tightly packed inner leaves. The arrangement of leaves is generally loose and forms a rounded, somewhat open head, giving the plant a delicate and attractive appearance.

During its lifespan, a butterhead lettuce plant typically produces a multitude of leaves, with the number of leaves per plant varying based on the specific variety and growing conditions. Upon reaching maturity, the plant will yield tiny flowers resembling daisies, typically displaying a yellow hue. These flowers give way to elongated seed pods, containing numerous seeds that can be harvested for future planting. The number of seeds produced per plant can vary widely, but generally, a single butterhead lettuce plant can yield hundreds of seeds, ensuring a continuous supply for home gardeners.

When sowing butterhead lettuce seeds, opt for a soil that drains effectively and is abundant in organic compounds, maintaining a pH value in the range of 6.0 to 6.8. Sow the seeds directly into the soil, approximately 1/4 inch deep and 12 inches apart. Water the seeds gently but consistently, keeping the soil moist but not waterlogged. Butterhead lettuce grows best in cooler temperatures, making it an excellent choice for early spring or fall planting. Seedlings will usually emerge within 7 to 14 days, and the mature lettuce can be harvested in approximately 60 to 70 days. To encourage a continuous harvest, consider sowing new seeds every two to three weeks during the growing season.

Loose Leaf Lettuce Varieties: Simpson, Oak Leaf, Red Sails, and Salad Bowl

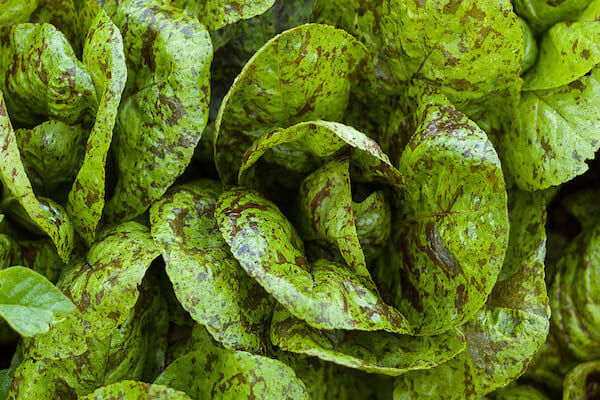
As the name suggests, these lettuces do not form a compact head. They are available in a range of colors, encompassing green, red, as well as varieties with speckles. Numerous loose-leaf lettuce varieties exist for those who enjoy gardening, whether it be traditional or container gardening, each possessing unique attributes.

  • Black Seeded Simpson
  • Oak Leaf
  • Lollo Rossa
  • Red Sails
  • Salad Bowl
looseleaf lettuce

Time to sow seed: Loose-leaf lettuce is a cool season crop that thrives when planted during spring and fall months. For the best growth results, plant the seeds in spring about 4-6 weeks prior to the anticipated final frost. For autumn planting, start sowing seeds roughly 6-8 weeks ahead of the first predicted frost. Loose-leaf lettuce seeds are typically small, oval, and flat, measuring around 2-3 mm in length. When sowing, use the broadcasting method to scatter the seeds evenly across the soil surface, ensuring that they have ample space to grow and develop. This versatile lettuce variety is an excellent choice for gardeners seeking a quick and straightforward addition to their garden.

Fertilizing: When fertilizing loose-leaf lettuce, gardeners have the choice between artificial fertilizers and natural source fertilizers to provide essential nutrients for optimal growth. Artificial fertilizers, such as those with a balanced N-P-K ratio can be applied in granular or liquid forms following the package instructions. Alternatively, natural source fertilizers like compost, aged manure, or fish emulsion offer eco-friendly options for potassium and contribute to overall soil health. To promote successful lettuce growth, apply fertilizer at the beginning of the growing season to support establishment, and follow up with additional applications throughout the season as needed. Being mindful of the specific nutrient requirements for loose-leaf lettuce will help gardeners maintain plant health and achieve a bountiful harvest. Number of days to harvest: Loose-leaf lettuce generally matures from seed to harvest within 35-55 days, depending on the specific variety. To attain maturity, it requires a sufficient number of sunny days, typically around 20-30 days of sunlight exposure. Additionally, loose-leaf lettuce needs approximately 10-15 days of rainfall or consistent moisture to ensure optimal growth and development.

Number of days to harvest: Loose-leaf lettuce boasts the remarkable capability of regrowing after being harvested. By implementing a cut above the root approach, gardeners can stimulate regrowth by trimming the leaves approximately 1-3 inches above the soil, while leaving the stem and some foliage intact. Maintaining proper hydration for the plant will prompt new leaves to emerge within a week or two. It's important to acknowledge that the cut's length can impact the lettuce's future growth. A shorter cut might lead to fewer leaves, whereas a longer cut could potentially result in a greater harvest of loose-leaf lettuce.

Coppicing: Loose-leaf lettuce is typically characterized by its mild, slightly sweet flavor, although the sweetness level can fluctuate depending on the variety and specific growing conditions. To achieve and maintain optimal sweetness, it's essential to provide cooler temperatures and consistent moisture throughout the growing process. By carefully monitoring and adjusting the environment, gardeners can enhance the natural sweetness of their loose-leaf lettuce, making it a delightful addition any summer salad.

Sweet scale: To successfully grow loose-leaf lettuce, enhancing soil fertility is crucial. Gardeners can improve the soil by incorporating both man-made and natural mineral and manure additives. Artificial fertilizers with a balanced N-P-K ratio, such as 10-10-10 can provide essential nutrients, while natural amendments like compost, naturally aged manure, or kelp can contribute to long-term soil health and fertility. The optimal soil for cultivating loose-leaf lettuce is one that's both well-draining and fertile, with a pH range ideally between 6.0 and 7.0. Guaranteeing an ample blend of minerals like nitrogen, phosphorus, and potassium in the soil establishes a perfect setting for loose-leaf lettuce to flourish, culminating in a rich harvest.

Depending on the variety, loose-leaf lettuce plants can reach a height of 6-12 inches and a width of 6-10 inches. The leaves themselves can differ in size from small to medium and often exhibit a spectrum of striking colors such as green, red, or a mix of both. The texture of these leaves is generally tender and delicate, with a fresh, crisp feel when consumed. Furthermore, loose-leaf lettuce emits a mild, pleasant aroma, which is characteristic of fresh garden greens.

How big the plant grows: Depending on the variety, loose-leaf lettuce plants can reach a height of 6-12 inches and a width of 6-10 inches. The leaves themselves can differ in size from small to medium and often exhibit a spectrum of striking colors such as green, red, or a mix of both. The texture of these leaves is generally tender and delicate, with a fresh, crisp feel when consumed. Furthermore, loose-leaf lettuce emits a mild, pleasant aroma, which is characteristic of fresh garden greens.

Flower and seed: A single loose-leaf lettuce plant can yield up to 300 seeds when it bolts and blossoms during summer's warmth. It is crucial to differentiate between lettuce cultivated for seed production and that grown for consumption, as bolting impacts the flavor and texture of the leaves. The lettuce plant produces numerous seed pods, each containing multiple seeds. These seeds typically are tiny, possess an oval form, and their color can fluctuate between white and brown. The flowers, which are responsible for attracting pollinators, exhibit vibrant hues and have a pleasant aroma. Ultimately, the plant's successful pollination leads to a bountiful production of seeds within the seed pods.

Refreshing Crisphead Lettuce: A Guide to Great Lakes, Ithaca, and Crispino Varieties

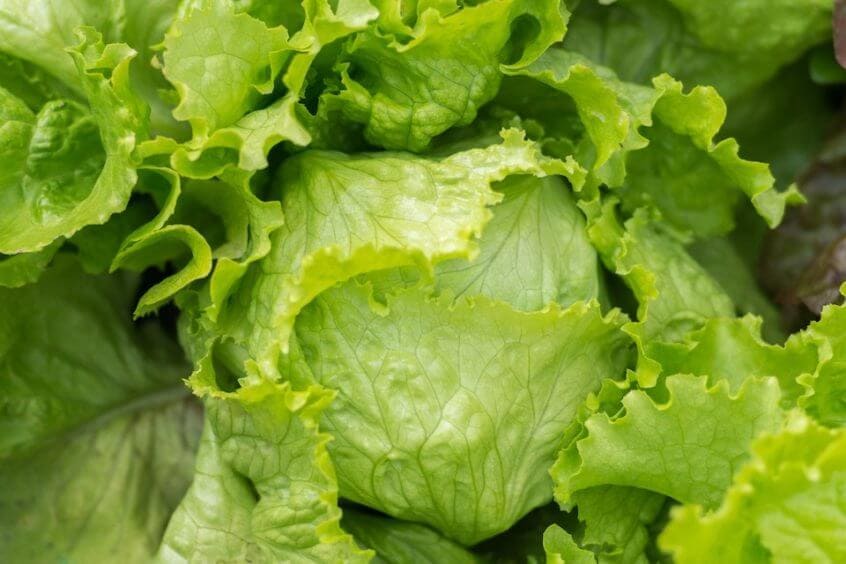
The most common example of crisphead lettuce is Iceberg. This variety has a crisp texture and mild flavor, perfect for adding crunch to salads and sandwiches. There are several varieties of crisphead, each with an genetic ability to grow in a variety of climates. The most famous variety is Iceberg, which is commonly found on supermarket shelves, but other popular crisphead lettuce varieties are available including:

  • Great Lakes
  • Ithaca
  • Summertime
  • Crispino
  • Sierra
crisphead lettuce

Spring and fall planting: Crisphead lettuce, also known as iceberg lettuce, is a popular leafy green vegetable valued for its crunchy texture and mild flavor. The spring and fall seasons are the most suitable times for planting crisphead lettuce, as it thrives in cooler temperatures. During these seasons, daytime temperatures generally range from 60 to 70°F, which is ideal for crisphead lettuce growth. Gardeners can choose to plant seeds or nursery transplants, depending on their preferences and the time available for cultivation.

For those choosing to begin with seeds, it's crucial to plant them straight into soil that drains well and is packed with nutrients. The seeds should be about 1/4 inch deep and spaced 12 inches apart. You can commence seed germination indoors 4 to 6 weeks prior to the final frost of the spring season, or 6 to 8 weeks before the first frost in the autumn. When using nursery transplants, it is crucial to select healthy and robust seedlings that show no signs of disease or pests. Transplant the seedlings outdoors when they have 3 to 4 true leaves, spacing them 12 inches apart in rows 18 to 24 inches apart. Regardless of whether you're planting seeds or transplants, maintaining a steady soil moisture, and offering the plants sufficient sunlight is critical for ensuring their best possible growth. Crisphead lettuce typically takes 70 to 85 days to reach maturity, depending on the specific variety and growing conditions.

Feeding the plant, says to harvest, coppicing: Feeding crisphead lettuce plants is essential for promoting healthy growth and ensuring a bountiful harvest. As lettuce has a shallow root system, it benefits from regular applications of organic fertilizers that include phosphorous that provide essential nutrients for optimal growth. Before planting, it is advisable to incorporate well-aged compost or manure into the soil to improve its fertility and structure. Additionally, during the growing season, side-dressing the plants with organic fertilizers, such as compost or aged manure, can further support their nutrient requirements.

There are several organic fertilizers that can be used for feeding crisphead lettuce plants. Fish emulsion, seaweed extract, and worm castings are all outstanding sources of crucial nutrients like nitrogen, phosphorus, and potassium. These fertilizers not only promote healthy foliage growth but also improve the overall soil structure and fertility. While using organic fertilizers, it's vital to adhere to the manufacturer's guidelines concerning the correct rates of application and timing. This helps prevent over-fertilization, which could result in too much leaf growth and compromise the development of a solid head. Crisphead lettuce generally takes between 70 and 85 days to reach maturity, depending on the specific variety and growing conditions. For optimal growth, it requires a minimum of 6 hours of sunlight per day, although some afternoon shade can be beneficial in warmer climates to prevent bolting or leaf scorch. While crisphead lettuce does appreciate consistent moisture, it does not require heavy irrigation or a perpetually wet environment. Over-watering can lead to root rot and other diseases. Instead, aim for a well-draining soil that retains adequate moisture without becoming waterlogged. As for the ability to regrow from cut stems, crisphead lettuce may produce a few additional leaves when the central stem is left intact after harvesting; however, the regrowth is typically limited, and the quality of the new leaves may not match that of the original harvest. Keep the plant well-watered but be aware that regrowth may not be as successful as with other lettuce types.

Bitter of sweet: Iceberg lettuce, also known as crisphead lettuce, is characterized by its mild flavor, which is neither particularly sweet nor bitter. Its flavor is more subtle compared to other varieties of lettuce, which makes it a flexible option for salads, sandwiches, and wraps. The crunchy texture of iceberg lettuce is one of its most notable attributes and has contributed significantly to its popularity in various culinary applications.

The preferred soil type for iceberg lettuce is a well-draining loamy soil rich in organic matter. A soil composition that includes ample amounts of decomposed organic material, such as compost or aged manure, provides essential nutrients and helps retain moisture, promoting healthy plant growth. The perfect soil pH for cultivating iceberg lettuce ranges from 6.0 to 6.8, promoting optimal nutrient absorption. Earthworms perform a significant function in preserving soil health. They decompose organic matter and aerate the soil, consequently enhancing the soil's structure, its capacity to retain water, and the availability of nutrients for plants, such as iceberg lettuce. Iceberg lettuce is distinguished by its large, tightly packed leaves that form a dense, round head. The outer leaves are typically light green, while the inner leaves gradually become whiter as they are shielded from sunlight. The aroma of iceberg lettuce is subtle and fresh, reflecting its mild taste. The texture of the leaves is crisp and crunchy, providing a satisfying mouthfeel when consumed. Iceberg lettuce plants grow from a single stem, with the leaves arranged in a rosette pattern that ultimately forms the characteristic compact head. The plant portions typically consumed are the leaves, which can be easily separated from the head for use in various dishes, while the central stem and root system are discarded.

Total number of seeds per plant: Iceberg lettuce, like other lettuce varieties, produces seeds through the process of flowering, also known as bolting. Bolting usually occurs when the plant is exposed to increased temperatures or longer daylight hours, which triggers the lettuce to transition from vegetative growth to reproductive growth. When bolting, the lettuce plant sends up a central stalk that eventually produces small, daisy-like flowers. These flowers are generally yellow in color and are responsible for the production of seeds.

After pollination, the flowers develop into elongated seed pods, each containing multiple seeds. The quantity of seed pods each plant produces can fluctuate depending on elements like the health of the plant and the conditions in which it's grown. Typically, however, a single plant can yield a considerable number of pods. On average, each seed pod may contain between 10 and 25 seeds, although this number can vary. Once the seed pods have matured and dried on the plant, they can be harvested for seed collection. For seed storage, extract them from the pods and store them in a location that's cool, dry, and dark, like inside an airtight container or a sealed envelope. Properly stored seeds can remain viable for up to three years, ensuring a continuous supply for future planting.

Bloomsdale, Regiment, Nero: Spinach Varieties Worth Planting

Spinach is a highly nutritious and versatile green that can be enjoyed raw or cooked. It grows quickly and can be harvested multiple times throughout the season. Spinach comes in three primary types:

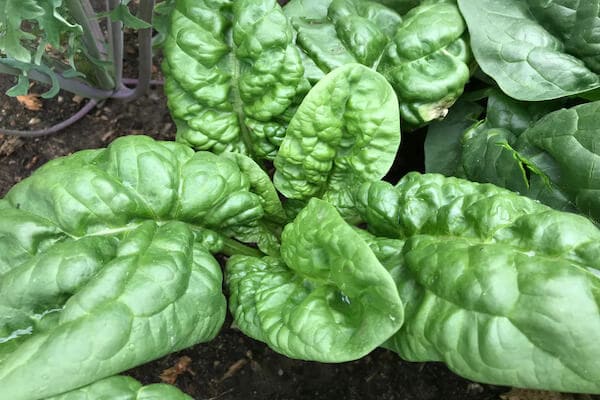
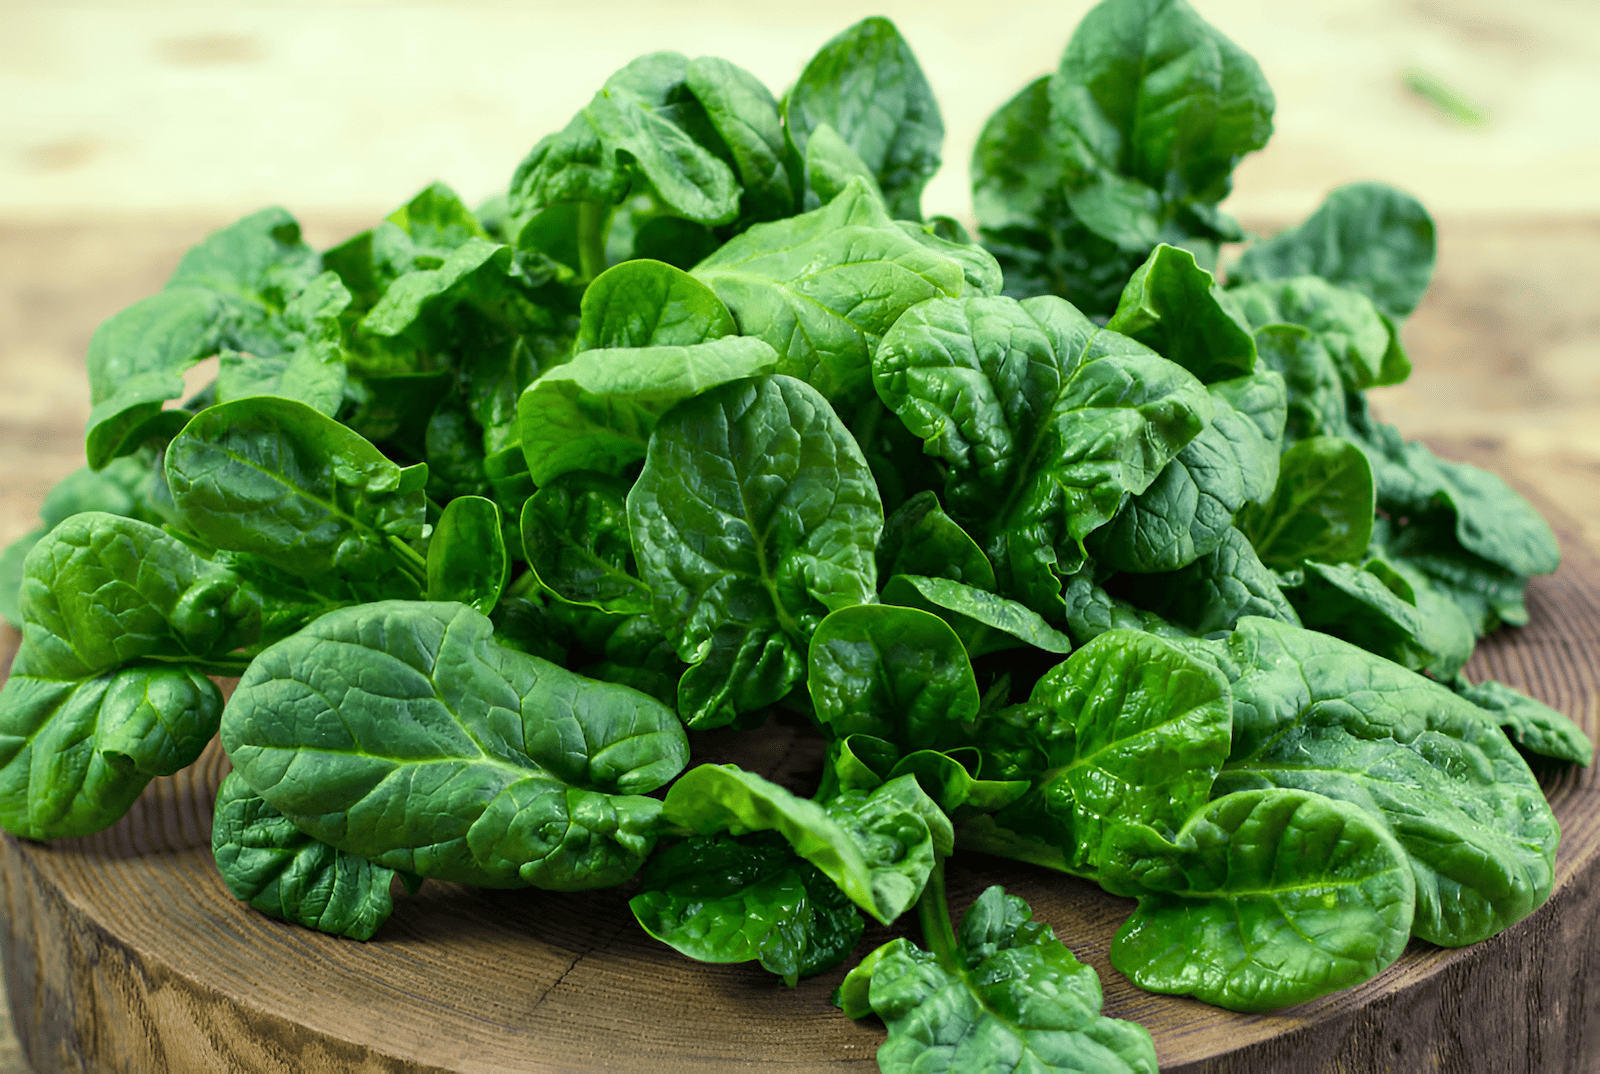
Savoy: : The Savoy variety, often seen in supermarkets, is characterized by its dark green, wrinkled leaves. It possesses a somewhat bitter flavor and is well-suited for salads, stir-fries, and soups. Savoy spinach varieties are characterized by their crinkled, curly leaves. Some popular savoy spinach varieties include:

  • Bloomsdale
  • Regiment
  • Tyee
  • Merlo Nero
  • Viroflay
bloomsdale spinach

When to plant: Being a cool-season crop, spinach thrives in lower temperatures, which makes it a perfect plant to cultivate during the spring and autumn seasons in North America and Europe. To plant spinach in the spring, it's recommended to sow seeds 4-6 weeks before the last expected frost. For fall planting, seeds should be sown 6-8 weeks before the first expected frost. By planting spinach during the appropriate times, gardeners can ensure that the crop has optimal growing conditions, with cooler temperatures and adequate moisture. Spinach plants are also sensitive to heat and high temperatures, so growing spinach during the hotter months can result in smaller, bitter-tasting leaves. To enjoy a bountiful harvest of crisp and delicious spinach leaves, it's important to pay attention to the recommended planting times and provide the right growing conditions for this cool-season crop.

Fertilizer and feed: Growing large, nutrient-packed, dark green leaves of spinach can be achieved by using both natural and manmade fertilizing compounds. A balanced fertilizer with an N-P-K ratio of 10-10-10 or 14-14-14 is ideal for spinach growth, providing essential nutrients for healthy growth and development. Organic fertilizers such as compost or aged manure can be incorporated into the soil to enhance its fertility, improve drainage, and boost its capacity to retain moisture. Applying these fertilizers according to package instructions, usually at the time of planting and once again mid-season, can help to ensure that spinach plants receive the necessary nutrients for optimal growth and development. In addition to using fertilizers, gardeners can also incorporate natural methods such as using fish emulsion or seaweed extract as foliar sprays to promote leafy growth and overall plant health. By utilizing both natural and manmade fertilizing compounds, gardeners can grow a plentiful harvest of delicious and nutritious spinach.

Ready To Pick: Savoy spinach, known for its dark green, crinkled leaves, is a popular choice for gardeners and cooks alike. This nutrition-rich green leafy vegetable is usually prepared for harvest approximately 40-50 days post-planting, contingent on the particular variety and the conditions in which it's grown. To ascertain whether your savoy spinach is ripe for picking, search for leaves around 6-8 inches long, featuring a deep green hue and a texture that's both tender and crunchy. It is important to harvest spinach before it bolts, or goes to seed, as the leaves will become bitter and less palatable.

Baby spinach, favored for its tender, sweet flavor, can be harvested sooner than mature spinach. Generally, baby spinach leaves are ready to pick around 25-30 days after planting. To harvest baby spinach, simply select the leaves that are about 2-4 inches long, ensuring that they are vibrant in color and free of any wilting or yellowing.

Bloomsdale spinach, another popular spinach variety, is known for its large, crinkly leaves and resistance to bolting. For those aiming to harvest big leaf Bloomsdale spinach, you can expect the leaves to reach maturity around 45-55 days after planting. To achieve the best taste and texture, harvest the leaves when they are approximately 8-10 inches long, with a rich green hue and a slightly glossy appearance.

It's essential to keep track of your spinach plants' development and gather them at the right time to guarantee the best taste and nutritional content. Bear in mind that spinach can be harvested multiple times during its growth cycle, provided you leave sufficient leaves for the plant to keep growing. While harvesting spinach, utilize a clean, sharp pair of scissors or a knife to trim the outer leaves, allowing the inner leaves to carry on with their growth. This approach allows for a prolonged harvest period and a steady supply of fresh, delicious spinach from your garden.

Re-grow capability: Spinach has been cultivated for thousands of years and is known for its versatility and nutritional value. A distinctive feature of this plant is its capacity to regrow following a harvest, making it a sustainable and economically efficient crop to cultivate. To encourage regrowth of spinach, gardeners can simply cut the outer leaves 2-3 inches above the soil, leaving the stem and some leaves intact. This regrowth capability lets the plant keep producing fresh leaves for eating, ensuring a constant source of fresh and nutrient-rich spinach throughout its growth period. To ensure the success of regrowth, spinach plants should be kept well-watered, as consistent moisture is essential for growth. This regrowth capability lets the plant keep producing fresh leaves for eating, ensuring a constant source of fresh and nutrient-rich spinach throughout its growth period.

Taste: Savoy spinach is known for its mild, slightly sweet taste with a subtle hint of bitterness. The level of sweetness can vary depending on the variety of spinach and the growing conditions. Cooler temperatures and consistent moisture can enhance the sweetness of the spinach leaves, resulting in a more delicious and flavorful crop. The unique texture of savoy spinach leaves also contributes to its taste, with its crinkled, dark green leaves providing a satisfying crunch with each bite. By providing the optimal growing conditions for savoy spinach, gardeners can enjoy a bountiful harvest of sweet and nutritious spinach leaves throughout the growing season.

Type of soil: The success of growing Savoy spinach depends largely on the type of soil used. It flourishes in fertile, well-draining soil with a pH range of 6.0 to 7.0. The soil should be abundant in organic material, possessing a texture that facilitates effective drainage yet retains sufficient moisture to keep the roots well-hydrated. Gardeners can amend the soil with compost or aged manure to improve its fertility and drainage. Incorporating these organic substances can boost the soil's structure and composition and supply crucial nutrients that the spinach plants need to flourish. It's important to be aware that excessively compact or clay-like soil can restrict root growth and obstruct the plants' development. By providing the optimal soil conditions for Savoy spinach, including adequate water retention and fertility, gardeners can ensure a healthy and bountiful harvest of delicious and nutritious spinach leaves.

Plant dimensions: Savoy spinach, specifically the Bloomsdale variety, is a versatile leafy green that exhibits different dimensions at various growth stages. As baby spinach, the plants tend to be compact, with a height of around 2-4 inches and a similar width. Upon reaching full maturity, Bloomsdale spinach can grow up to 12-18 inches tall and spread out to a width of 8-12 inches. The crinkled leaves of this variety contribute to its unique appearance and make it a popular choice for both culinary uses and garden aesthetics. By understanding the growth patterns and dimensions of your spinach plants, you can efficiently plan your garden layout and ensure optimal growth conditions for a bountiful harvest.

Salad and serving count: Savoy spinach leaves are a vibrant, dark green color and have a unique crinkled texture that distinguishes them from other spinach varieties. The foliage is of moderate dimensions, typically spanning roughly 4-6 inches long and 2-4 inches wide. These nutrient-rich leaves are brimming with essential vitamins and minerals such as iron, calcium, and an abundant supply of vitamins A and C. Each savoy spinach plant can produce 25-35 leaves, providing an ample supply of fresh greens for salads and other dishes. Generally, it takes around 3-4 leaves to make a serving size of salad, making savoy spinach a versatile and practical crop for gardeners who want to enjoy a delicious and healthy harvest of fresh greens.

Seed pods per plant: When growing Savoy spinach, it is important to note that a single plant has the potential to produce hundreds of seeds. These seeds reside within their respective pods, which are usually petite and exhibit a green hue. The size of these pods can fluctuate depending on the specific variety. On average, a single Savoy spinach plant can produce several seed pods, each containing multiple seeds. As the plant attains maturity, the seed pods start drying out and adopting a brown color, signaling their readiness for harvest. Post-harvest, these pods can be cracked open to extract the seeds, which may then be preserved for subsequent planting. By allowing a few plants to go to seed, gardeners can ensure a steady supply of fresh, healthy spinach leaves year after year.

Growing Spinach: A Guide to Semi Savoy, Indian Summer, Teton, and Catalina Varieties

Semi-savoy: A hybrid of savoy and smooth-leaf spinach, semi-savoy has a less crinkled texture but retains the same taste as savoy spinach. Semi-savoy spinach varieties are known for their slightly crinkled leaves, which are less curly than savoy spinach. Some popular semi-savoy spinach varieties include:

  • Indian Summer
  • Teton
  • Catalina
  • Crocodile
  • Space
semisavoy spinach

Planting: When planting spinach, it is important to choose the right time of year for optimal growth. Spinach is a cool season crop and thrives when planted during the spring and fall seasons. For a spring planting session, the best practice is to sow the seeds 3-5 weeks ahead of the last anticipated frost, whereas for a fall planting, the seeds should be sown 5-7 weeks prior to the first expected frost. The seeds ought to be placed about ½ inch deep into the soil, maintaining a spacing of approximately 1-2 inches between each. On the other hand, gardening enthusiasts may opt to plant seedlings instead. These should be implanted about 2-3 inches deep in the soil and spaced roughly 4-6 inches apart from each other. By following these planting guidelines, gardeners can ensure that their spinach plants have the best chance for healthy growth and a bountiful harvest.

Feed and weed: To ensure healthy growth and a bountiful harvest, semi-savoy spinach plants need to be fed and weeded regularly. Weeds that commonly compete with semi-savoy spinach in the garden include chickweed, dandelions, and lamb's quarters, which can quickly take over and outcompete the spinach for nutrients and water. Consistent weeding and mulching can aid in deterring the growth of weeds while maintaining soil moisture and fertility. Additionally, semi-savoy spinach plants benefit from regular feeding with a balanced fertilizer or organic compost. Gardeners should aim to fertilize the plants every 4-6 weeks throughout the growing season, following the package instructions for application rates and techniques. This will help to bolster plant growth and promote the development of healthy, nutrient-rich leaves. By providing proper nutrition and minimizing weed growth, gardeners can ensure a healthy and thriving crop of semi-savoy spinach.

Days before harvesting: Semi-savoy spinach typically takes around 40-50 days to mature from seed to harvest, depending on the variety. However, it's important to note that subsequent harvests may take less time due to the established rooting system of each plant. Upon establishment of the roots, the plant becomes more proficient at absorbing nutrients and water, which consequently accelerates its growth and development. Gardeners should plan to harvest the outer leaves of the plant as soon as they are large enough to eat, leaving the smaller, inner leaves to continue growing. This process enables the plant to persistently generate new leaves, ensuring an ongoing yield of fresh, nutritious spinach throughout its growth period.

Re-harvesting: Regarding re-harvesting, spinach possesses the unique capability to regenerate post-harvest. To promote regrowth, gardeners should cut the outer leaves of the plant, leaving about 3 inches of stem and some leaves intact. It's crucial to understand that the altitude of the cut may influence the speed of the plant's regrowth. A cut made higher up on the plant can lead to a slower regrowth rate, whereas a lower cut might catalyze more rapid regrowth. Ensuring the plant stays adequately hydrated is equally vital to stimulate regrowth, with new leaves typically sprouting within a span of one to two weeks. With proper care and attention, spinach plants can be harvested multiple times throughout the growing season.

Swwet and neat spinach: SRegarding re-harvesting, spinach possesses the unique capability to regenerate post-harvest. To promote regrowth, gardeners should cut the outer leaves of the plant, leaving about 3 inches of stem and some leaves intact. It's crucial to understand that the altitude of the cut may influence the speed of the plant's regrowth. A cut made higher up on the plant can lead to a slower regrowth rate, whereas a lower cut might catalyze more rapid regrowth. Ensuring the plant stays adequately hydrated is equally vital to stimulate regrowth, with new leaves typically sprouting within a span of one to two weeks. With proper care and attention, spinach plants can be harvested multiple times throughout the growing season.

Preferred soil: The ideal soil for growing semi-savoy spinach is well-draining, fertile, and rich in organic matter. Loamy soil, which consists of a balanced mix of sand, silt, and clay particles, is considered the best choice for cultivating semi-savoy spinach. This type of soil retains moisture effectively while allowing excess water to drain away, preventing waterlogged roots, and promoting the development of a healthy root system.

A key factor in achieving optimal soil composition for growing semi-savoy spinach is the incorporation of organic matter, such as compost or well-rotted manure. The addition of organic matter improves soil structure, nutrient content, and water retention, creating a supportive environment for the spinach plants' roots. The decomposition of organic matter also supports the soil's microbiological community, which breaks down nutrients into forms that can be readily absorbed by the plant.

The ideal soil pH for growing semi-savoy spinach ranges between 6.0 and 7.0. Maintaining the soil pH within this range ensures optimal nutrient availability and uptake, as well as fostering a thriving community of beneficial microorganisms. It is advisable to perform a soil test before planting to determine the pH and nutrient levels and make any necessary amendments to create the most favorable growing conditions.

The ideal soil pH for growing semi-savoy spinach ranges between 6.0 and 7.0. Maintaining the soil pH within this range ensures optimal nutrient availability and uptake, as well as fostering a thriving community of beneficial microorganisms. It is advisable to perform a soil test before planting to determine the pH and nutrient levels and make any necessary amendments to create the most favorable growing conditions.

Size of plant: A mature, ready-to-harvest semi-savoy spinach plant exhibits distinct characteristics that set it apart from other stages of growth. Semi-savoy spinach, known for its slightly crinkled leaves and more robust texture compared to smooth leaf spinach, reaches maturity within 35-50 days after planting, depending on the specific variety and growing conditions. When fully matured and ripe for harvest, the plant's stature typically spans between 6 and 12 inches in height, whereas its breadth may fluctuate between 4 and 6 inches.

A mature semi-savoy spinach plant boasts numerous stalks and branches, each adorned with several leaves that vary in size depending on their position on the plant. The exterior, more mature leaves are usually larger and exhibit a slightly rougher texture, while the interior leaves are smaller, more delicate, and bear a lighter hue. The leaf count on each plant can differ depending on factors like the cultivation conditions, the specific variety, and the plant's overall vitality. It is essential to harvest semi-savoy spinach when the leaves are young and tender for the best taste and texture. When semi-savoy spinach is allowed to grow beyond the harvesting stage and reach the flowering stage (bolting), it produces clusters of small, greenish-yellow flowers on a central flowering stalk. Bolting is triggered by increased daylight and higher temperatures, typically occurring after 50-60 days or more from planting, depending on the specific variety. Once the plant bolts, the leaves may become more fibrous and develop a bitter taste, making them less desirable for consumption. The flowering stalk can produce a significant number of seeds, which can be collected and saved for future planting or allowed to self-sow and perpetuate the spinach crop.

Savory Spinach: How to Grow Olympia, Corvair, and Seaside Varieties

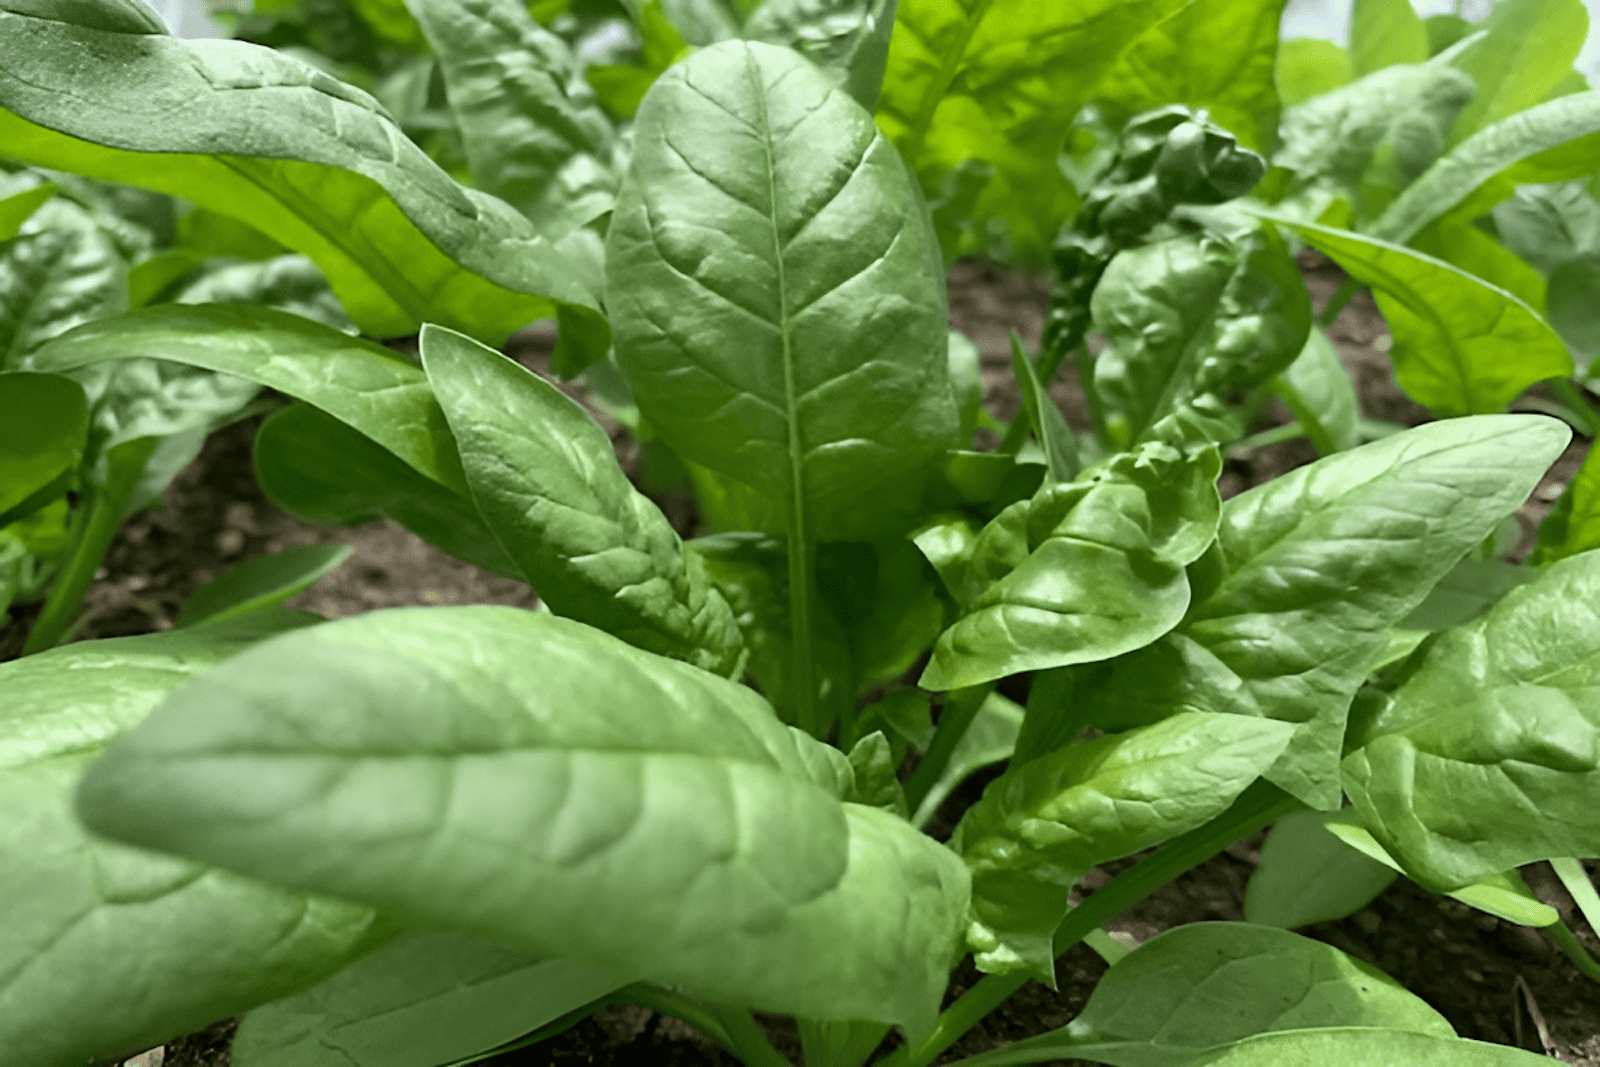
With flat, smooth leaves, this variety is perfect for baby spinach salads and is easier to clean than savoy spinach. Smooth-leaf spinach varieties are characterized by their flat, smooth leaves, making them easier to clean than savoy or semi-savoy varieties. Some popular smooth-leaf spinach varieties include:

  • Olympia
  • Corvair
  • Flamingo
  • Red Kitten
  • Seaside
smoothleaf spinach

Time of year to plant: Smooth leaf spinach is a cool-season crop, which makes the ideal time for planting during spring and fall. In the spring, it is best to sow seeds 3-6 weeks before the last expected frost. For fall planting, sow seeds 6-9 weeks before the first expected frost. This timing ensures that the spinach plants will thrive in the most favorable conditions for their growth. When planting smooth leaf spinach seeds, sow them at a depth of 1/2 inch and space the transplants about 12 inches apart. This allows for optimal growth and development. To protect the young plants from potential damage caused by frost, use material frost covers. These covers shield the smooth leaf spinach, ensuring their healthy growth and development during potentially harsh weather conditions.

Suggested fertilizers: Smooth leaf spinach requires adequate fertilization to thrive and produce lush, healthy leaves. Supplying the appropriate nutrients guarantees vigorous growth in plants, imbues them with a rich green color, and enhances their resistance against pests and diseases. Numerous fertilization choices are available, such as water-release and time-release fertilizers, each designed to meet the unique requirements of the plant. Water-release fertilizers dissolve rapidly in water, providing an immediate boost of nutrients to the spinach plants. This type of fertilizer is ideal for addressing nutrient deficiencies or giving plants a quick boost during their growth stages.

Conversely, time-release fertilizers provide a slower, more consistent distribution of nutrients over a prolonged duration, lessening the necessity for frequent applications. These fertilizers are designed to slowly break down, providing a steady supply of essential nutrients that support the healthy growth of smooth leaf spinach throughout its life cycle. Time-release fertilizers are particularly useful in promoting strong root development, ensuring the efficient uptake of nutrients, and ultimately contributing to an abundant harvest. By understanding the specific fertilizing requirements of smooth leaf spinach and selecting the appropriate fertilization method, gardeners can cultivate a thriving, productive crop.

Days to maturity: Smooth-leaf spinach generally requires 45-55 days to mature from seed to harvest, with the exact timeframe depending on the specific variety. Each variety may exhibit differences in growth rates, leaf texture, and flavor profiles, which contribute to the diversity within the smooth leaf spinach category. To ensure optimal growth and development, these spinach plants need a minimum number of sun and rain days, which varies depending on the variety and growing conditions. By carefully selecting the appropriate smooth leaf spinach variety for the garden, growers can enjoy a bountiful harvest tailored to their preferences and climate conditions.

Regrow capability: SSmooth-leaf spinach generally requires 45-55 days to mature from seed to harvest, with the exact timeframe depending on the specific variety. Each variety may exhibit differences in growth rates, leaf texture, and flavor profiles, which contribute to the diversity within the smooth leaf spinach category. To ensure optimal growth and development, these spinach plants need a minimum number of sun and rain days, which varies depending on the variety and growing conditions. By carefully selecting the appropriate smooth leaf spinach variety for the garden, growers can enjoy a bountiful harvest tailored to their preferences and climate conditions.

TTo encourage new leaf growth from cut stalks, proper harvesting techniques are essential. Begin by selecting mature leaves, typically the outermost ones, which are ready for harvest once they reach the desired size. Gently sever the stalks approximately 1-2 inches above the base of the plant, making sure to leave a small section of the stalk untouched. This remaining stalk segment contains dormant buds, which will activate and grow into new leaves once exposed to sunlight and moisture. It is crucial to avoid damaging the plant's central growing point, as this can hinder new leaf production and affect the overall health of the plant.

Sweet to bitterness scale: To encourage new leaf growth from cut stalks, proper harvesting techniques are essential. Begin by selecting mature leaves, typically the outermost ones, which are ready for harvest once they reach the desired size. Gently sever the stalks approximately 1-2 inches above the base of the plant, making sure to leave a small section of the stalk untouched. This remaining stalk segment contains dormant buds, which will activate and grow into new leaves once exposed to sunlight and moisture. It is crucial to avoid damaging the plant's central growing point, as this can hinder new leaf production and affect the overall health of the plant.

The sweetness in smooth leaf spinach leaves is primarily due to the presence of naturally occurring sugars, such as glucose and fructose, which provide a pleasant taste when consumed. Contrarily, bitterness in spinach leaves may be attributed to the build-up of substances like oxalic acid and flavonoids. Environmental factors, including the makeup of the soil, the temperature, and the level of sunlight exposure, can considerably influence the balance between sweetness and bitterness in spinach leaves. For instance, cooler temperatures and ample sunlight can enhance the production of sugars, resulting in a sweeter taste, while stress factors like excessive heat or nutrient deficiencies can increase the levels of bitter compounds. Furthermore, the plant's age also contributes to its flavor profile; younger leaves usually have a sweeter, more tender taste compared to mature leaves, which could evolve a more robust, possibly bitter taste as they grow older. By understanding the factors that contribute to the taste of smooth leaf spinach, gardeners can optimize their growing conditions and select suitable varieties to produce spinach with their preferred flavor profile.

Preferred soil and composition: The sweetness in smooth leaf spinach leaves is primarily due to the presence of naturally occurring sugars, such as glucose and fructose, which provide a pleasant taste when consumed. Contrarily, bitterness in spinach leaves may be attributed to the build-up of substances like oxalic acid and flavonoids. Environmental factors, including the makeup of the soil, the temperature, and the level of sunlight exposure, can considerably influence the balance between sweetness and bitterness in spinach leaves. For instance, cooler temperatures and ample sunlight can enhance the production of sugars, resulting in a sweeter taste, while stress factors like excessive heat or nutrient deficiencies can increase the levels of bitter compounds. Furthermore, the plant's age also contributes to its flavor profile; younger leaves usually have a sweeter, more tender taste compared to mature leaves, which could evolve a more robust, possibly bitter taste as they grow older. By understanding the factors that contribute to the taste of smooth leaf spinach, gardeners can optimize their growing conditions and select suitable varieties to produce spinach with their preferred flavor profile.

Size, leaf and seed: The average size of a mature smooth leaf spinach plant typically ranges between 6 to 12 inches in height and 6 to 8 inches in width. Nonetheless, these aspects can fluctuate based on the particular variety, cultivation conditions, and the plant's age. The average number of leaves per smooth leaf spinach plant can also vary, but a healthy, well-grown plant can produce anywhere from 15 to 25 leaves. The leaf count is determined by elements like the plant's age, cultivation conditions, and overall vitality. Spinach thrives as a cool-season crop, favoring temperatures within the range of 60-65°F (15-18°C). It can adapt to a range of soil types, but particularly enjoys well-drained soil with a pH level between 6.5 and 7.5. Proper care, including sufficient sunlight, water, and appropriate fertilization, can significantly impact the plant's leaf production.

Spinach plants are dioecious, meaning there are separate male and female plants. The average seed count per plant can differ widely, but a female spinach plant can produce hundreds of seeds. The time from flowering to seed development in spinach plants typically takes around 4-6 weeks. Once the plant begins to bolt (produce a flower stalk), it shifts its energy from leaf production to flowering and seed development. This transition is often triggered by increasing day length and rising temperatures. The seeds can be harvested once they have matured and turned brown, which usually occurs a few weeks after flowering.

Garden Delights: Bull's Blood, Chioggia, Detroit, and Golden Beet Tops

Beet greens are often overlooked as a delicious and nutritious garden green. While the root of the beet is commonly used in various dishes, the leafy tops are packed with vitamins and minerals. Beet greens can be harvested and enjoyed while the root continues to grow, providing a dual-purpose crop. These leaves carry a mildly sweet, earthy taste and can be either sautéed, steamed, or incorporated into salads. Some popular beetroot varieties with flavorful greens include:
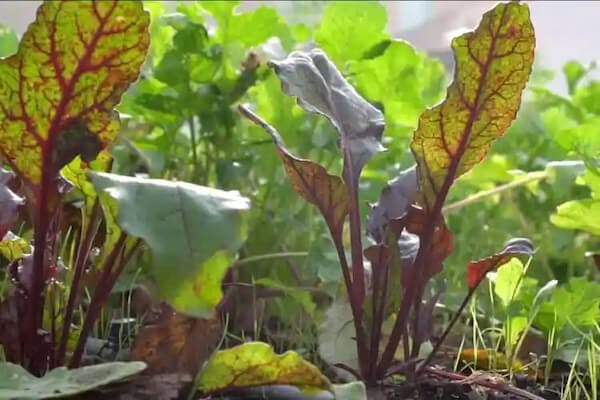
  • Bull's Blood
  • Early Wonder
  • Chioggia
  • Detroit Dark Red
  • Golden Beet
beettops spinach

Best time of year to plant: Optimal planting season: Beet greens flourish in cool weather conditions, thereby making spring and autumn the ideal periods for planting this cool-season crop. For spring planting, it is recommended to sow beet green seeds 3 weeks before the last expected frost, giving the seeds enough time to germinate before the weather warms up. For fall planting, sow seeds 9 weeks before the first expected frost to ensure that the beet greens have enough time to mature before the weather becomes too cold. It's crucial to recognize that although beet roots have a preference for ample sunlight, beet greens can withstand a bit of shade and might even find it advantageous during the peak heat of the growing season.

Feeding beet plants: Nourishing beet plants: Various fertilization options exist for beets, including nitrogen-based fertilizers like urea, ammonium nitrate, and ammonium sulfate, which foster vigorous leaf and root growth. Phosphorus-based fertilizers, such as bone meal or rock phosphate, aid in root development, while potassium-based fertilizers like potassium chloride or potassium sulfate bolster plant resilience. Those who prefer organic gardening methods can use compost, aged manure, worm castings, or natural fertilizers like fish emulsion, seaweed extract, or bone meal. To avoid over-fertilization, it's important to follow the application instructions carefully and test soil periodically to adjust the fertilization program accordingly.

Days to maturity: Beet tops, also known as beet greens, come from the Beta vulgaris plant and are a nutritious and versatile leafy green. When grown for microgreens, beet tops have a relatively quick turnaround, with a maturation period of approximately 10-14 days. During this time, the plants will reach a height of around 1-3 inches, with their first set of true leaves appearing. Microgreens can be harvested by snipping the tender young leaves just above the soil line. These microgreens are brimming with nutrients and offer versatility in culinary applications, featuring in an array of dishes, including salads and smoothies.

For sprouts, which are germinated seeds typically consumed shortly after the initial shoot emerges, beet seeds can take about 5-8 days to reach the desired stage. When grown for young beets with small, tender bulbs, the maturation period extends to roughly 45-55 days. These little bulbs are often harvested when they reach a diameter of 1-2 inches. In contrast, mature beets with larger roots can take around 55-70 days to reach their full size, which typically ranges from 2-4 inches in diameter. The maturation period and size can vary depending on the specific beet variety and growing conditions. It's important to note that the beet greens can be harvested and consumed at any stage, from microgreens to mature beets, adding valuable nutrients and flavor to your meals.

Re-grow and sprout capability: Beet greens have limited regrowth capability after harvesting, so it's important to handle them carefully to encourage regrowth. To proceed with this, you need to trim the peripheral foliage of the plant approximately 2 inches above the ground level, ensuring that the stem and some leaves remain untouched. Keep in mind, though, that over-harvesting the leaves could potentially disrupt the beetroot's growth and maturity. Therefore, it's crucial to strike a balance in your harvesting methods to guarantee the plant retains sufficient energy for yielding a robust root crop. Moreover, beet greens, though packed with essential nutrients and adaptable to an array of culinary uses, should not be the sole focus of your harvest. Remember, the main objective of the plant is to generate beetroot, not just the leaves. If you want to continue harvesting beet greens throughout the growing season, it's recommended to rotate your harvesting efforts among several plants to allow each one to recover between harvests.

Optimal soil for beetroot: For the cultivation of beetroot that yields strong and vibrant beet tops, it's crucial to plant them in nutrient-rich soil that drains well and has a pH range of 6.0 to 7.0. You can improve soil fertility and drainage by adding compost or aged manure to the soil. Furthermore, it's crucial to steer clear of sowing beetroot in dense clay soils, as this could hinder the development of the roots and escalate the risk of diseases affecting the root. Be sure to also avoid soils with high salt content, as this can cause discoloration and bitterness in the beet greens. By choosing the right soil type and amending it as needed, you can help your beetroot grow strong and healthy, producing abundant and nutritious beet tops for your enjoyment.

Beet plants (Beta vulgaris) come in various types and sizes, depending on the specific variety and stage of growth. Typically, fully grown beet plants can attain a height ranging from 1 to 2 feet and a spread of 12 to 18 inches. The size of beet sprouts, microgreens, young beet tops, and mature beet tops can vary based on the plant's development stage.

Beet sprouts, which are the initial shoots that emerge from germinating seeds, are tiny, usually measuring about 0.5-1 inch in length. Microgreens, the next stage of growth, are harvested when the seedlings have developed their first set of true leaves. By this stage, the plants will have grown to a height of approximately 1 to 3 inches. As beet plants continue to grow and develop, their leaves will increase in size. Young beet tops, harvested from plants that are approximately 4-6 weeks old, can have leaves that range from 4-6 inches in length. The dimensions of the leaves can fluctuate based on variables like the particular strain and the conditions under which they are grown.

Mature beet tops, like those of sugar beets (Beta vulgaris subsp. vulgaris), can reach considerable sizes, with leaves that extend up to 12-18 inches in length. The leaf size of sugar beet plants can vary based on factors such as soil fertility, water availability, and sunlight exposure. Sugar beets are grown primarily for their large, energy-rich roots, which are used to produce sugar. Nonetheless, their leaves are not only edible but also rich in nutrients, thus serving as a beneficial inclusion in a variety of meals. It is important to note that while the size and appearance of beet plants may change throughout their growth, their nutritional value and culinary versatility remain consistent across all stages.

Beet leaves per plant: The beet plant typically produces 8-12 leaves per plant, depending on the growing conditions and variety. These leaves are large and thick, with a glossy surface and a deep green color. They grow directly from the root and can reach up to 2 feet in length and 1 foot in width. Beet leaves are highly nutritious, containing vitamins A and K, as well as minerals such as calcium, iron, and magnesium. They are also a good source of antioxidants and fiber, making them a valuable addition to any diet.

Beet seed per plant: Beet seeds are small, oval-shaped, and have a hard outer coating. They typically measure about 2-3 millimeters in diameter and are a dark reddish-brown color. Beet seeds are enclosed in seed pods that are roughly the size of a pea and have a green color when immature, turning brown and papery as they mature. The flowers of the beet plant are small and inconspicuous, growing on tall stalks above the leaves. Each beet plant can produce anywhere from 50 to 200 seeds, depending on the growing conditions and variety. Beet seeds can remain viable for several years if stored in a cool, dry place, making them a great option for gardeners who want to save seeds for future plantings.

Colorful Garden: Growing Fordhook, Bright Lights, and Ruby Red Chard

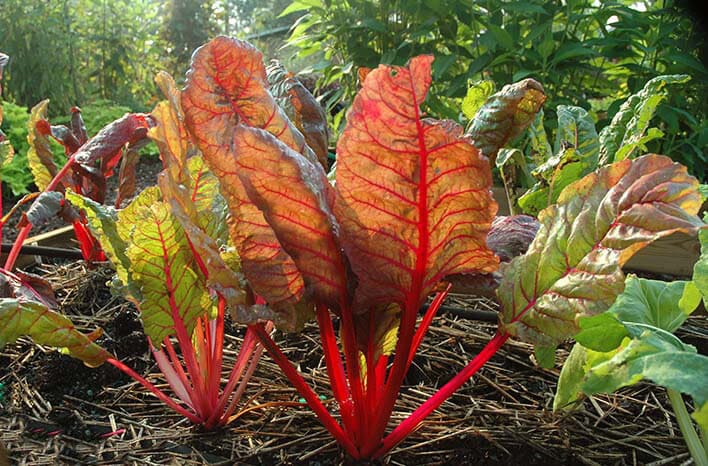
Swiss chard is a leafy green vegetable with colorful stems and large, tender leaves. Some popular Swiss chard varieties include:

  • Fordhook Giant
  • Bright Lights
  • Ruby Red (also known as Rhubarb Chard)
  • Peppermint Stick
  • Rainbow Chard
swiss chard

Chard is a cool season crop that grows best during spring and fall. For spring planting, it is recommended to sow chard seeds 2-4 weeks before the last expected frost, while for fall planting, sow seeds 6-8 weeks before the first expected frost. This will help ensure that your chard gets the cooler temperatures it needs to thrive.

Chard benefits from a balanced fertilizer with an N-P-K ratio of 14-14-14. You can apply this fertilizer according to the package instructions, usually at the time of planting and once again mid-season. This will help provide your chard with the necessary nutrients it needs to grow strong and healthy.

Chard benefits from a balanced fertilizer with an N-P-K ratio of 14-14-14. You can apply this fertilizer according to the package instructions, usually at the time of planting and once again mid-season. This will help provide your chard with the necessary nutrients it needs to grow strong and healthy.

Swiss chard typically takes 50-60 days to mature from seed to harvest, although the timing can vary depending on the variety. To encourage regrowth after harvesting, simply cut the outer leaves 3.5 inches above the soil, leaving the stem and some leaves intact. Be sure to keep the plant well-watered, and new leaves should begin to grow within a week or two. Swiss chard prefers to grow in well-draining, fertile soil with a pH between 6.5 and 7.5. To improve soil fertility and drainage, you can amend the soil with compost, compost tea, or aged chicken manure, which has a high nitrogen content. Swiss chard plants can grow up to 2-3 feet tall and 1-2 feet wide, depending on the variety, and each plant typically produces 22-33 leaves, depending on the growing conditions.

Finally, if you're looking to save seeds for future planting, know that a single Swiss chard plant can produce over 500 seeds once it bolts and flowers. With proper care and attention, your chard plants can produce a bountiful harvest of nutritious greens for you to enjoy.

Kale: Navigating a Forest of Green

Kale is a powerhouse of nutrients and a popular addition to many gardens. There are several varieties of kale, each with its unique flavor and texture:

Dwarf Redbor, Scarlett, and Curly Kale

This variety has ruffled, dark green leaves with a mildly bitter flavor. It is excellent in salads, stir-fries, and smoothies. Curly kale is a popular variety of kale, known for its ruffled, curled leaves and robust flavor. Some popular curly kale varieties include:

  • Dwarf Blue Curled
  • Redbor
  • Starbor
  • Winterbor
  • Scarlett
curly garden kale

Lancinato, Black Magic, Toscana and Tronchda Kale

Also known as "dinosaur kale" or "Tuscan kale," this variety has long, narrow, and slightly wrinkled leaves. Lacinato kale has a sweeter and more delicate flavor compared to curly kale. Lacinato kale, also known as dinosaur kale, Tuscan kale, or black kale, is characterized by its dark blue-green, textured leaves. Some popular lacinato kale varieties include:

  • Nero di Toscana
  • Tronchuda Beira
  • Black Magic
  • Dazzling Blue
lancinato kale

Red Russian Kale

This variety has flat, fringed leaves with a red-purple hue. It has a mild, sweet flavor and is perfect for salads or sautéed dishes. Red Russian kale is known for its distinctive reddish-purple stems and flat, fringed leaves with a slightly gray-green color. Some popular Red Russian kale varieties include:
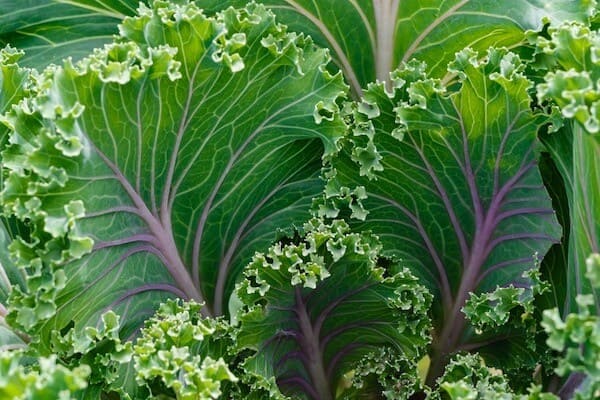
  • Red Russian (standard variety)
  • Ragged Jack
  • Red Ursa
  • White Russian
red russian kale

Kale is a cool-season crop, meaning it grows best in cooler temperatures during spring and fall. In spring, it is recommended to sow kale seeds 4-8 weeks before the last expected frost, while for fall planting, it is best to sow seeds 6-8 weeks before the first expected frost.

To help your kale thrive, it is suggested to use a balanced fertilizer with an N-P-K ratio of 10-10-10. You can apply this to your soil as directed on the package.

On average, Red Russian kale takes 50-70 days to mature from seed to harvest, but the timing can vary depending on the variety.

When it comes to taste, Red Russian kale generally has a mildly sweet and nutty flavor with a hint of bitterness. Cooler temperatures and consistent moisture can enhance its sweetness, while frost exposure can intensify the sweetness even further.

To help your Red Russian kale thrive, it prefers to grow in well-draining, fertile soil with a pH between 6.0 and 7.0. Amending the soil with compost or aged manure can improve its fertility and drainage.

Red Russian kale plants can grow up to 2-3 feet tall and 1-2 feet wide, depending on the variety. On average, each plant can produce 25-35 leaves, but this can also depend on the growing conditions.

If you're looking to save seeds for future planting, know that a single Red Russian kale plant can produce over 100 seeds.

Choosing the perfect green for your garden depends on your personal preferences, the climate, and your available space. Experimenting with different varieties can lead to discovering new flavors, textures, and growing patterns that suit your taste and gardening style. When selecting greens for your garden, consider factors such as your climate, soil type, and sunlight availability, as well as your culinary preferences.

By planting a diverse range of greens, you can enjoy a continuous harvest throughout the growing season, offering a multitude of options for fresh salads, smoothies, and cooked dishes. As you explore the world of leafy greens, you'll not only enhance the beauty and productivity of your garden but also provide your family with a healthy, delicious, and sustainable food source. Happy gardening!

Choosing The Perfect Green For You Garden - Article Posted Jan 22, 2024

  • crop circle farms twitter icon
  • crop circle farms facebook icon
  • crop circle farms instagram icon
  • crop circle farms linkedin icon
  • crop circle farms youtube icon
  • crop circle farms email icon